Introduction
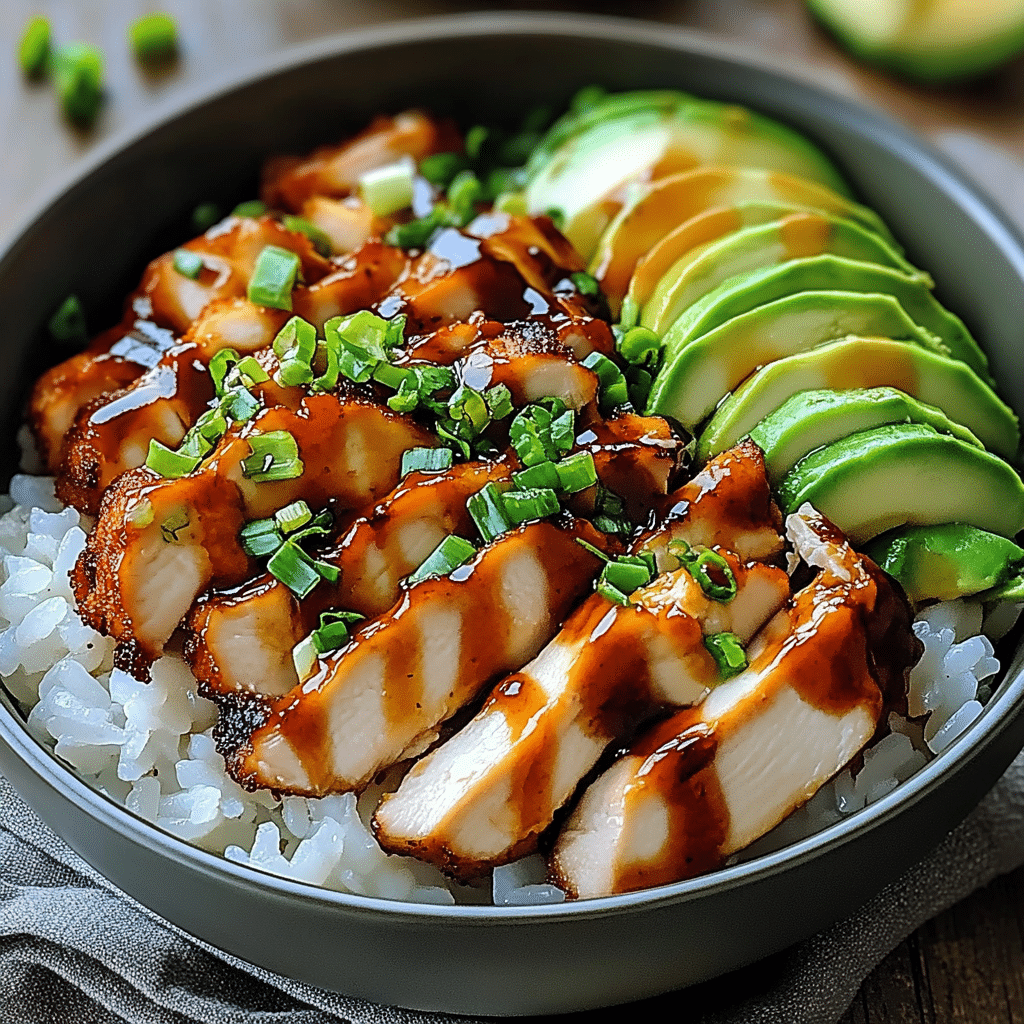
Looking for a quick and satisfying meal that’s packed with flavor? Look no further than this Easy Sticky Chicken Rice Bowl! This dish is a perfect combination of tender, juicy chicken glazed with a sweet and savory sauce, served over a bed of fluffy rice. The sticky sauce, made with ingredients like honey, soy sauce, and garlic, gives the chicken a deliciously sweet and savory flavor that pairs perfectly with the rice. It’s an easy-to-make dish that comes together in just a few simple steps, making it ideal for busy weeknights or casual weekend dinners. Plus, it’s highly customizable — you can add vegetables, switch up the protein, or even make it spicy if you like a little heat. This chicken rice bowl is sure to become a go-to recipe in your kitchen!
Why You’ll Love This Recipe
1. Quick and Easy
This dish comes together in under 30 minutes, making it perfect for busy nights when you want a delicious, homemade meal in a hurry.
2. Flavorsome Sticky Sauce
The sweet and savory sticky sauce coats the chicken perfectly, creating a rich, flavorful glaze that adds depth to every bite.
3. Customizable
You can easily add your favorite veggies or switch out the chicken for beef, tofu, or shrimp to suit your preferences.
4. One-Bowl Meal
With protein, carbs, and veggies all in one bowl, this dish is the ultimate comfort food that’s filling and satisfying.
5. Kid-Friendly
The sweet sticky sauce is sure to be a hit with kids, making this an easy way to get the little ones to enjoy a wholesome meal.

Ingredients
- 2 chicken breasts or thighs, cut into bite-sized pieces
- 1 cup uncooked white rice (or brown rice)
- 1 tablespoon olive oil (for cooking)
- 2 tablespoons soy sauce
- 1 tablespoon honey
- 1 teaspoon sesame oil
- 2 cloves garlic, minced
- 1 tablespoon grated ginger (optional)
- 1 tablespoon rice vinegar or apple cider vinegar
- 1 teaspoon cornstarch (optional, for thickening)
- 1/2 cup water or chicken broth
- Salt and pepper, to taste
- Sesame seeds (for garnish)
- Green onions, sliced (for garnish)
- Steamed or stir-fried veggies, optional (e.g., broccoli, bell peppers, snap peas)
Variations
- Spicy Sticky Chicken: Add sriracha, chili flakes, or a dash of hot sauce to the sauce to give it a spicy kick.
- Vegetarian Option: Replace the chicken with tofu or tempeh for a vegetarian-friendly version.
- Add Veggies: Stir in steamed broccoli, snap peas, or bell peppers for added texture and nutrients.
- Brown Rice or Quinoa: Swap white rice for brown rice or quinoa for a healthier, more filling alternative.
- Sweet and Sour Twist: Add a little pineapple juice or chunks of pineapple for a tropical, sweet and sour flavor.
How to Make the Recipe
Step 1: Cook the Rice
Start by cooking the rice according to package instructions. Set aside once done, keeping it warm.
Step 2: Cook the Chicken
In a large skillet or wok, heat olive oil over medium-high heat. Season the chicken pieces with salt and pepper, and add them to the skillet. Cook the chicken until it is golden brown and cooked through, about 5-7 minutes, stirring occasionally. Remove the chicken from the skillet and set it aside.
Step 3: Make the Sticky Sauce
In the same skillet, add the soy sauce, honey, sesame oil, minced garlic, grated ginger (if using), and rice vinegar. Stir to combine, and let the sauce simmer for 2-3 minutes. If you’d like a thicker sauce, mix 1 tablespoon of cornstarch with 2 tablespoons of water, then add it to the sauce. Continue to simmer until the sauce thickens to your desired consistency.
Step 4: Combine Chicken and Sauce
Return the cooked chicken to the skillet with the sauce, tossing to coat the chicken evenly. Let it cook for another 2-3 minutes until the chicken is fully coated in the sticky glaze.
Step 5: Assemble the Bowl
Scoop the cooked rice into bowls. Top with the sticky chicken and drizzle the sauce from the skillet over the chicken. Garnish with sesame seeds and sliced green onions.
Step 6: Serve
Serve the sticky chicken rice bowl with your favorite veggies, whether steamed, stir-fried, or fresh. Enjoy this quick and flavorful dish!

Tips for Making the Recipe
- Cook the Chicken in Batches: If you’re making a large batch, cook the chicken in two batches to ensure that it browns properly and doesn’t overcrowd the pan.
- Adjust the Sweetness: If you prefer a sweeter sauce, increase the amount of honey or add a little more soy sauce to balance the flavors.
- Use a Non-Stick Skillet: Using a non-stick skillet will help prevent the sticky sauce from sticking too much to the pan.
- Make It Ahead: You can cook the chicken and sauce ahead of time, store it in the fridge, and simply reheat when you’re ready to serve.
How to Serve
Serve your Easy Sticky Chicken Rice Bowl in individual bowls, making it perfect for a casual family dinner. You can also serve it alongside a fresh green salad or sautéed vegetables for a complete meal. If you want to get extra creative, add a few extra toppings like chopped peanuts, cilantro, or a squeeze of lime for added flavor.
Make Ahead and Storage
Storing Leftovers
Leftover chicken and rice can be stored in an airtight container in the refrigerator for up to 3-4 days. The rice and chicken will continue to soak up the sticky sauce, so it may taste even better the next day!
Freezing
While the rice can be frozen, the sticky chicken may not retain its perfect texture when frozen. If you plan to freeze it, it’s best to separate the chicken and rice before freezing. Freeze the chicken and sauce together and the rice separately. Reheat thoroughly before serving.
Reheating
To reheat, microwave the chicken and rice together in a covered dish until heated through, about 2-3 minutes, stirring halfway. You can also reheat it in a skillet over medium heat, adding a splash of water or broth to keep the sauce from drying out.
FAQs
1. Can I use chicken thighs instead of chicken breasts?
Yes, chicken thighs are a great alternative and will add more moisture and flavor to the dish.
2. Can I use brown rice?
Yes, brown rice works just as well. It will take a little longer to cook, so plan accordingly.
3. Can I make this dish gluten-free?
Yes, use tamari or gluten-free soy sauce to make the dish gluten-free.
4. How do I make the sauce spicier?
You can add sriracha, red pepper flakes, or a dash of hot sauce to the sauce for extra heat.
5. Can I use other vegetables in the bowl?
Absolutely! Add steamed or stir-fried vegetables like broccoli, bell peppers, snap peas, or carrots for extra nutrition and flavor.
6. Can I make this recipe with tofu instead of chicken?
Yes! Simply replace the chicken with firm tofu that’s pressed and cut into cubes, and follow the same instructions.
7. How can I make the sauce thicker?
Mix a little cornstarch with water and add it to the sauce to thicken it, or let it simmer longer to reduce.
8. Can I use quinoa instead of rice?
Yes, quinoa is a great substitute for rice if you prefer a different base.
9. How do I store leftover sticky chicken rice bowls?
Store leftovers in an airtight container in the refrigerator for 3-4 days.
10. Can I add nuts to the dish?
Yes! Adding toasted peanuts, cashews, or almonds as a garnish will provide extra crunch and flavor.

Conclusion
This Easy Sticky Chicken Rice Bowl is the perfect combination of quick, delicious, and satisfying. Whether you’re cooking for a busy weeknight dinner or preparing a meal for a casual gathering, this dish is sure to impress. The sticky, sweet sauce and tender chicken paired with rice make for a comforting meal that everyone will love. Best of all, it’s easy to customize with your favorite ingredients, making it a versatile option for any occasion!
Print
Easy Sticky Chicken Rice Bowl
- Total Time: 2 hours 15 minutes
- Yield: 1 large loaf (8–10 servings) 1x
- Diet: Vegetarian
Description
Celebrate Easter with this Italian Easter Bread with Dyed Eggs! This traditional, sweet, braided bread is adorned with colorful, hard-boiled eggs, symbolizing the resurrection. It’s soft, slightly sweet, and perfect for breakfast or dessert. The beautiful braided design and vibrant eggs make it a festive centerpiece for your Easter table. Whether you enjoy it with your family or give it as a gift, this bread is sure to bring joy and flavor to your holiday celebration.
Ingredients
For the Bread Dough:
- 4 cups all-purpose flour, plus extra for kneading
- 1/2 cup granulated sugar
- 1 packet (2 1/4 teaspoons) active dry yeast
- 1 teaspoon salt
- 1/2 cup milk, warmed to 110°F
- 1/2 cup water, warmed to 110°F
- 1/4 cup unsalted butter, softened
- 2 large eggs
- 1 teaspoon vanilla extract
- 1 teaspoon orange zest (optional, for flavor)
- 1/4 cup sugar (for sprinkling)
For the Topping:
- 4–6 hard-boiled eggs (dyed in pastel colors for Easter)
- 1 egg yolk (for egg wash)
Instructions
-
Prepare the Dough: In a large bowl, combine the warm milk, warm water, and 1 tablespoon of sugar. Sprinkle the yeast over the mixture and let it sit for about 5-10 minutes until it becomes frothy.
-
Mix the Ingredients: In a separate large bowl, whisk together the flour, remaining sugar, and salt. Add the yeast mixture, softened butter, eggs, and vanilla extract. Mix everything until the dough begins to come together.
-
Knead the Dough: Turn the dough onto a floured surface and knead for 5-8 minutes, or until the dough is smooth and elastic. If the dough is too sticky, add a little more flour. Place the dough in a greased bowl, cover it with a clean towel, and let it rise in a warm place for 1 to 1.5 hours, or until it has doubled in size.
-
Shape the Bread: Punch down the dough and divide it into 3 equal portions. Roll each portion into a long rope (about 12-15 inches long). Twist the ropes together into a braid and shape it into a circle. Pinch the ends together to form a round loaf.
-
Add the Dyed Eggs: Gently press the hard-boiled, dyed eggs into the dough. You can place them symmetrically around the braid or in any pattern you prefer. Make sure the eggs are securely nestled into the dough.
-
Let the Dough Rise Again: Cover the braided loaf with a clean towel and let it rise again for about 30-45 minutes, or until it has puffed up.
-
Prepare the Egg Wash: In a small bowl, whisk together the egg yolk with a tablespoon of water. Brush this mixture over the entire loaf to give it a golden color when baking.
-
Bake the Bread: Preheat your oven to 350°F (175°C). Place the bread on a parchment-lined baking sheet and bake for 25-30 minutes, or until the bread is golden brown and sounds hollow when tapped on the bottom.
-
Cool and Serve: Allow the bread to cool on a wire rack. Once cooled, slice the bread and serve. The dyed eggs can be eaten along with the bread or kept as a festive decoration.
Notes
- The dyed eggs are symbolic and can be eaten along with the bread or kept as part of the decoration.
- You can adjust the flavor of the bread by adding lemon zest or a sprinkle of cinnamon if you prefer.
- This bread can be stored in an airtight container for up to 3 days.
- Prep Time: 1 hour 15 minutes (for rising time)
- Cook Time: 25-30 minutes
- Category: Bread, Easter, Holiday
- Method: Baked
- Cuisine: Italian