If you’re looking for a fun and festive way to impress your friends and family this spooky season, these easy Halloween Cookies are exactly what you need. Whether you’re hosting a Halloween party or just want to add a sweet treat to your autumn gatherings, these cookies combine simple ingredients with playful decorations that capture the spirit of the holiday. From classic pumpkin shapes to creepy spider designs, these Halloween Cookies are quick to make, irresistible to eat, and guaranteed to bring a smile to your guests’ faces.
Why You’ll Love This Recipe
- Simple and Quick: The recipes focus on easy-to-find ingredients and straightforward steps so you can have treats ready in no time.
- Festive and Fun: Each cookie is designed with Halloween motifs that add festive charm to any table.
- Customizable: These recipes can be tailored to various tastes and dietary needs without losing their spooky appeal.
- Kid-Friendly: Perfect for baking with kids who will enjoy helping decorate and shape the cookies.
- Deliciously Moist: These cookies aren’t just about looks; they deliver great texture and flavor every bite.
Ingredients You’ll Need
The beauty of these Halloween Cookies lies in their simple, staple ingredients. Each one plays a crucial role in achieving that perfect cookie texture, flavor, and color, making the process feel approachable even for beginner bakers.
- All-purpose flour: Provides the sturdy base that holds your cookies together while keeping them tender.
- Sugar: Adds the needed sweetness to balance the other flavors in the cookies.
- Butter: Delivers richness and a soft texture essential to a perfect homemade cookie.
- Eggs: Bind the ingredients, adding moisture and fluff to the dough.
- Vanilla extract: Enhances the flavor complexity with a warm, comforting note.
- Baking powder: Ensures your cookies rise just enough for a light bite.
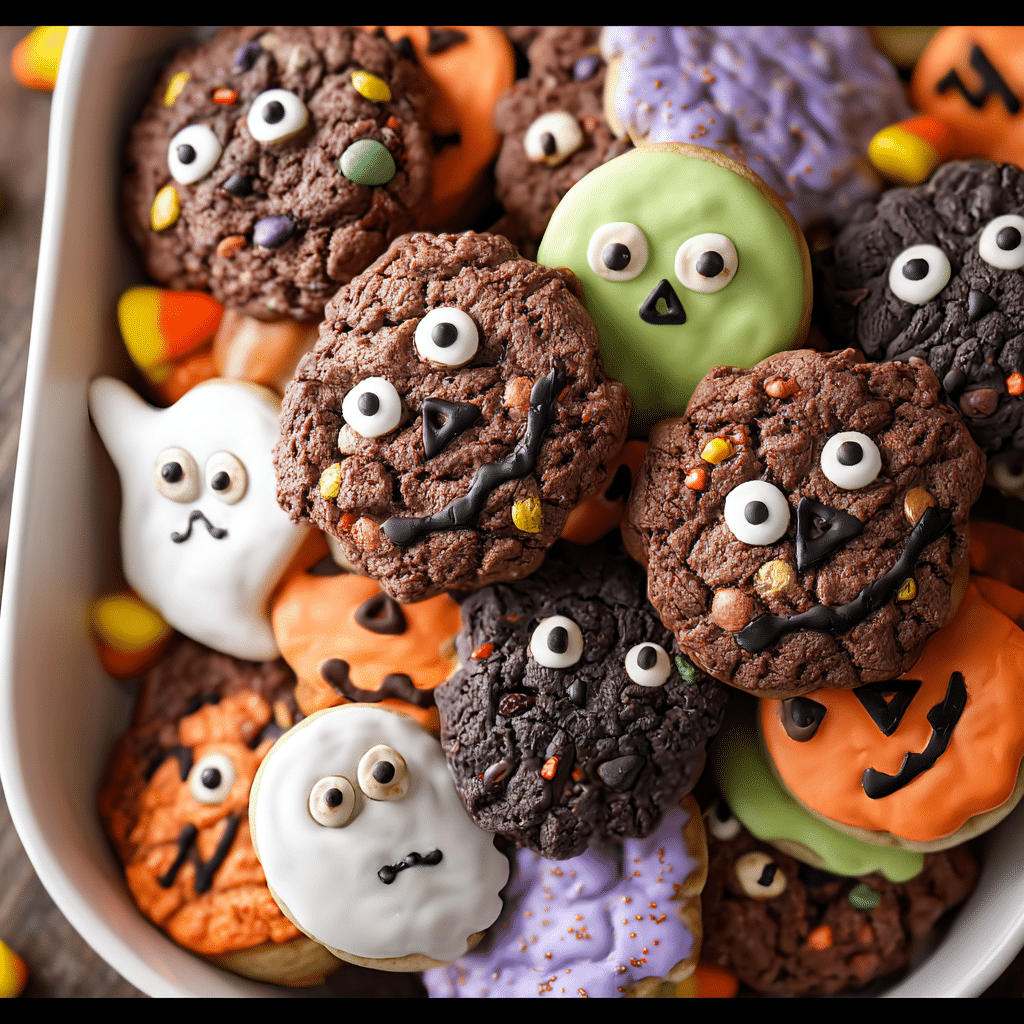
- Food coloring and decorations: Bring the Halloween spirit to life with vibrant oranges, blacks, reds, and fun toppings like sprinkles and edible eyes.
Variations for Halloween Cookies
These easy Halloween Cookies are super adaptable, making them perfect for anyone wanting to add a personal spin or adjust based on what’s in their pantry or dietary restrictions.
- Gluten-Free Option: Swap all-purpose flour for gluten-free flour blends for a safe, tasty treat.
- Vegan Version: Replace butter with coconut oil and eggs with flax eggs to keep these cookies plant-based.
- Spiced Delight: Add cinnamon, nutmeg, or pumpkin pie spice for a cozy autumn twist.
- Chocolate Lovers: Mix cocoa powder into the dough or add chocolate chips for an indulgent flavor boost.
- Decorating Fun: Use royal icing, edible markers, or colored sugar to create intricate designs or spooky faces.

How to Make Halloween Cookies
Step 1: Prepare the Dough
Start by creaming softened butter and sugar together until light and fluffy, then beat in eggs and vanilla extract. In a separate bowl, whisk together flour and baking powder. Gradually add the dry ingredients to wet, mixing until a smooth dough forms. If desired, divide the dough and mix in food coloring for vibrant Halloween hues.
Step 2: Chill the Dough
Wrap the dough tightly and refrigerate for at least one hour. Chilling firms up the dough, making it easier to roll out and helping the cookies maintain their shape during baking.
Step 3: Roll and Cut
Lightly flour a clean surface and roll out the chilled dough to about 1/4 inch thickness. Use your favorite Halloween-themed cookie cutters—pumpkins, ghosts, bats, or witches—to cut shapes, carefully transferring them to a baking sheet lined with parchment paper.
Step 4: Bake to Perfection
Bake the cookies in a preheated oven at 350°F (175°C) for 8 to 12 minutes, or until the edges are just golden. Avoid overbaking to keep them soft and chewy.
Step 5: Decorate and Enjoy
Once cool, get creative with decorating! Use royal icing, colored sugar, candy eyes, or edible markers to bring your Halloween Cookies to life, making each one a mini masterpiece.
Pro Tips for Making Halloween Cookies
- Chill for Success: Don’t rush skipping the dough chilling step—it helps the cookies hold their cute shapes perfectly.
- Use Parchment Paper: Baking on parchment prevents sticking and helps cookies bake evenly.
- Test Oven Temperature: An oven thermometer ensures your cookies bake at the correct heat for consistent results.
- Decorate on a Cool Cookie: Allow cookies to cool completely before decorating to avoid melting your icing or decorations.
- Keep it Fun: Let kids pick colors and decorations to add their own spooky spin.
How to Serve Halloween Cookies
Garnishes
Sprinkle cookies with edible glitter, crushed candy corn, or chopped toasted nuts to add texture and festive sparkle that impresses both eyes and taste buds.
Side Dishes
Pair these sweet treats with warm apple cider, hot chocolate, or a pumpkin spice latte to enhance the cozy, autumnal vibe of your Halloween gathering.
Creative Ways to Present
Arrange your Halloween Cookies on a tiered cake stand, or display them inside a spooky-themed glass jar or on a decorated Halloween platter to wow your guests before they even take a bite.
Make Ahead and Storage
Storing Leftovers
Place leftover Halloween Cookies in an airtight container at room temperature, and they will stay fresh and delicious for up to 5 days.
Freezing
You can freeze baked and decorated cookies by layering them between sheets of parchment paper in an airtight container; they keep well for up to 3 months.
Reheating
Warm cookies for a few seconds in the microwave or let them sit at room temperature to revive their softness and flavor.
FAQs
What’s the best way to keep Halloween Cookies soft?
Storing cookies in an airtight container with a slice of bread can help maintain moisture and keep them soft longer.
Can I use homemade food coloring instead of store-bought?
Yes, natural options like beet juice, turmeric, or spinach powder work well and add fun, subtle color without artificial ingredients.
How long does the dough keep in the fridge?
The dough can be safely stored in the refrigerator for up to 2 days before baking, tightly wrapped to prevent drying out.
Are Halloween Cookies suitable for freezing before baking?
Absolutely! Shape and freeze the dough pieces on a tray, then transfer to containers; bake from frozen by adding a couple of extra minutes to the bake time.
What decorations work best for kids?
Colorful sprinkles, edible googly eyes, and simple icing designs make decorating easy and enjoyable for children of all ages.
Final Thoughts
These easy Halloween Cookies are a delightful way to bring warmth, sweetness, and a touch of festive fun to your seasonal celebrations. With simple ingredients and clear steps, you can create memorable treats that everyone will love—so grab your mixing bowl and get ready to bake some spooky goodness that’s as enjoyable to make as it is to eat.